HTML5 Locator Map - Installation
Package overview
The HTML5 Locator Map installation package contains the following files:
| map.js | The core file of the map |
| map.css | The CSS file of the map |
| raphael.min.js | Raphael library required for the map to function |
| settings.js | Configuration parameters of the map |
| index.html | Description, installation manual and map preview |
| photo.jpg | Sample photo |
Installation Step-by-Step
So here is a quick step-by-step to install the map. For more detailed version of the installation guide please refer to this section.
Step 1: Upload files
First of all, you need to upload all map files to your website. You can use FTP or upload files using a file manager in the control panel of your hosting provider or CMS.
Step 2: Insert the map code to a page
Now you can embed the map to any page of your website. Simply insert the below HTML code to any place in the HTML code of a web page, where you want the map to show.
<!-- start Fla-shop.com HTML5 Map -->
    <div id='container'></div>
    <link href="map.css" rel="stylesheet">
    <script src="raphael.min.js" type="text/javascript"></script>
    <script src="settings.js" type="text/javascript"></script>
    <script src="map.js" type="text/javascript"></script>
    <script type="text/javascript">
    var map = new FlaMap(map_cfg);
    map.drawOnDomReady('container');
    </script>
<!-- end HTML5 Map -->
The code does the following.
<div id='container'></div>
This line is a placeholder for the map (see below).
<link href="map.css" rel="stylesheet">
This line loads the CSS file of the map. Note, that if the map.css file is located in the same folder as the web page, you don’t need to do anything. Otherwise, you need to specify the path to the map.css file in the href parameter:
<link href="/example_path/map.css" rel="stylesheet">
The next three lines load the required JS files.
    <script src="raphael.min.js" type="text/javascript"></script>
    <script src="settings.js" type="text/javascript"></script>
    <script src="map.js" type="text/javascript"></script>
The final part creates a map object and draws it:
    <script type="text/javascript">
    var map = new FlaMap(map_cfg);
    map.drawOnDomReady('container');
    </script>
Note the container parameter in the map.drawOnDomReady method. It must be equal to the id parameter of the div in the first line. Simply put, here we are telling the map what HTML element it should draw its content in.
Step 3: Save changes
Once you’re done with editing, you should upload the changed page back to the website. Or, if you edited the page online, just save changes. That’s it!
Advanced Installation
Sometimes you may need more flexibility in map setup, so here is the advanced installation procedure. The basic installation works in most modern browsers, but may produce HTML validation warnings due to the <link> tag outside of the <head> section.
Also, browsers interpret the HTML code line by line. This means scripts are not executed until a browser reaches lines with scripts. Hence, this means the map isn’t displayed until that too.
Let's pretend, that we uploaded our map and now it's files are accessible by the path /map/.
To make the map load when the page header loads, you need to place the <script> and <link> tags inside the <head> section of the HTML code, like that:
<head>
    <title>My beautiful map page </title>
<!-- start Fla-shop.com HTML5 Map header section -->
    <link href="/map/map.css" rel="stylesheet">
    <script src="/map/raphael.min.js" type="text/javascript"></script>
    <script src="/map/settings.js" type="text/javascript"></script>
    <script src="/map/map.js" type="text/javascript"></script>
<!-- end HTML5 Map header section -->
</head>
Then, place the map where you want it on the page inside the <body> tag:
<!-- start Fla-shop.com HTML5 Map -->
    <div id='container'></div>
    <script type="text/javascript">
    var map = new FlaMap(map_cfg);
    map.drawOnDomReady('container');
    </script>
<!-- end HTML5 Map -->
For a static page website the procedure is quite simple as both the <head> tag and the <body> tag are in the same file and can be edited easily.
However, if you use some CMS like Drupal or WordPress, you may need some more steps here. Most of CMS do not allow direct editing of the <head> section on the page. You need to modify a page template instead.
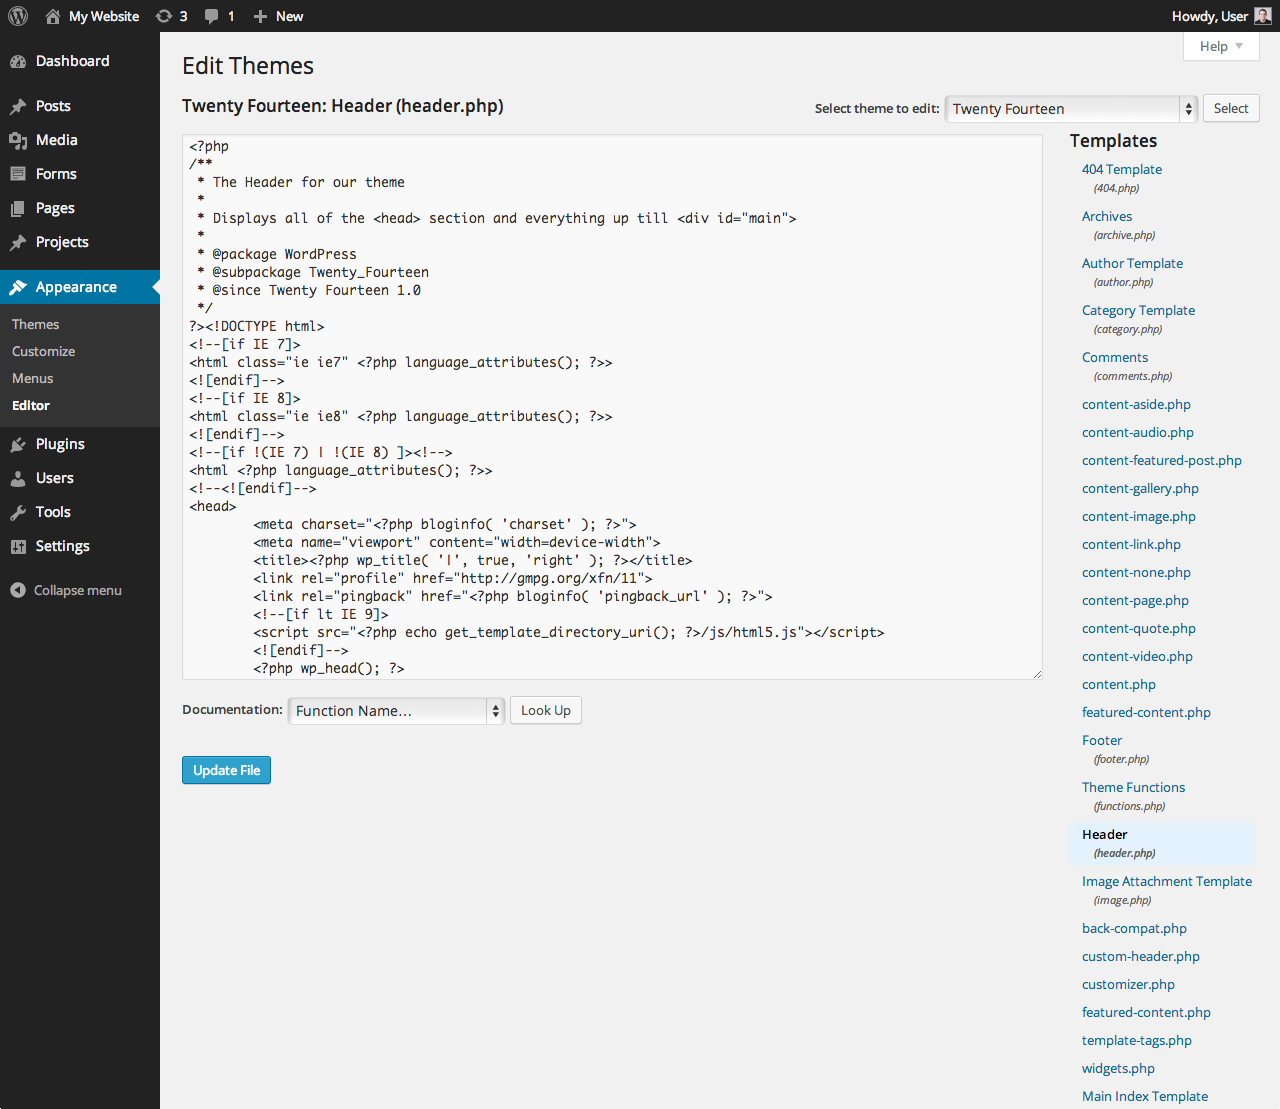
For WordPress the template containing the <head> section is usually called header.php. You can edit it under the Appearance section of the WordPress admin panel.
Screenshot:
Also, we offer specialized maps for WordPress that install just like any other WordPress plugin, without a single line of code at all. Please click this link to learn more about WordPress maps.