WordPress Drill-Down Map Plugin - Customization
All customization of the WordPress Drill-Down Map plugin can be made in WordPress dashboard.
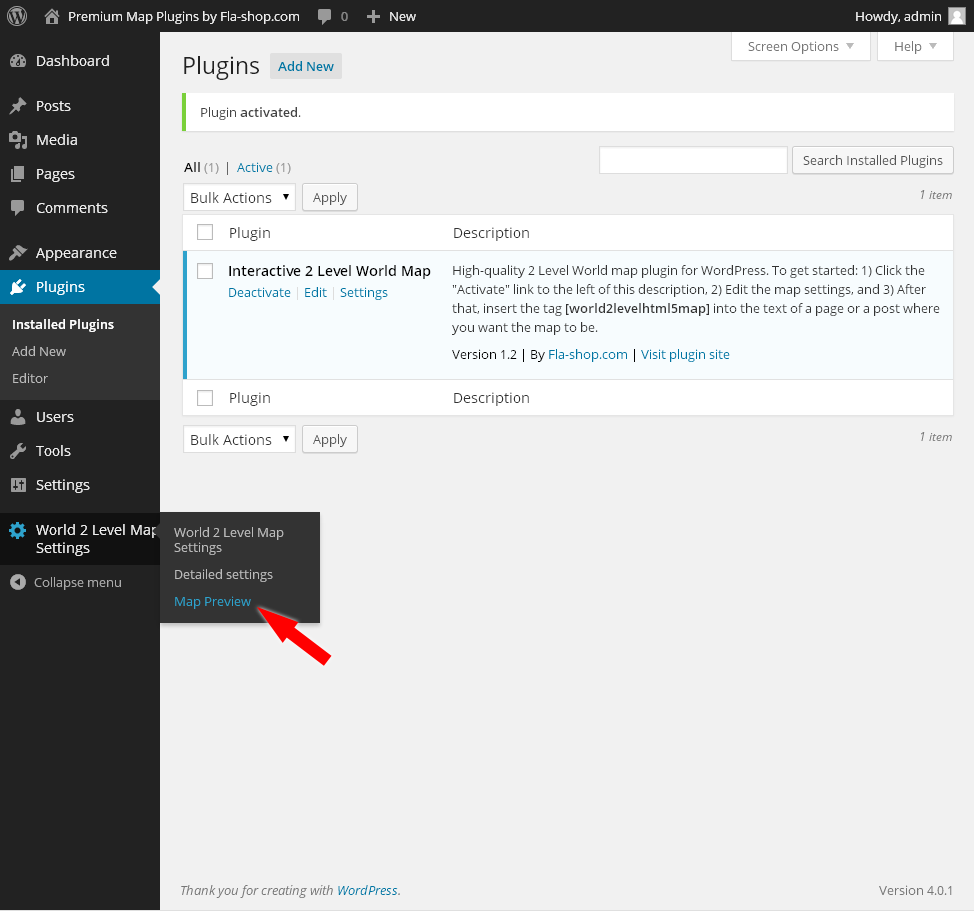
After the successful plugin installation you can see "Map Settings" menu at the left side of the screen:
 Now, let's look through all customization menus.
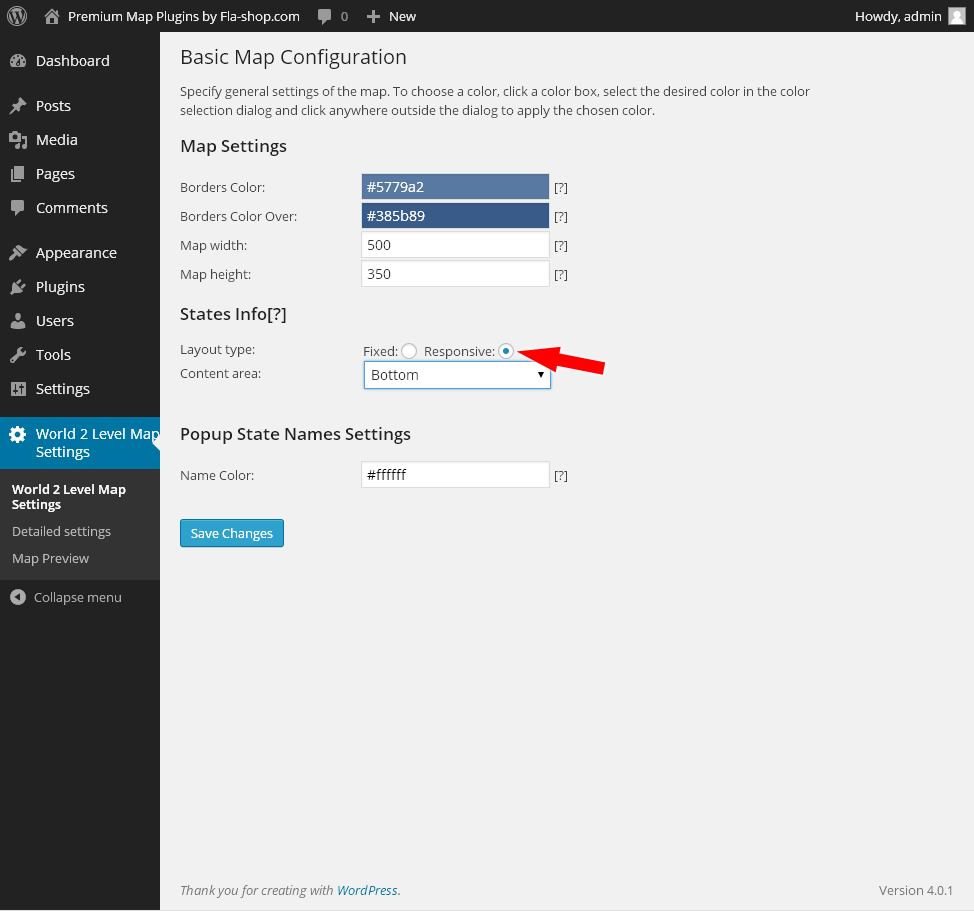
General Map Settings
This menu allows you to specify general settings of the map.
There are 3 groups of settings:
- Map settings (in this group you specify borders color and map height/width in pixels).
- States info (in this group you specify the content area disposition and fixed/responsive layout type).
- Popup State names settings (in this group you the name color for popup state names).
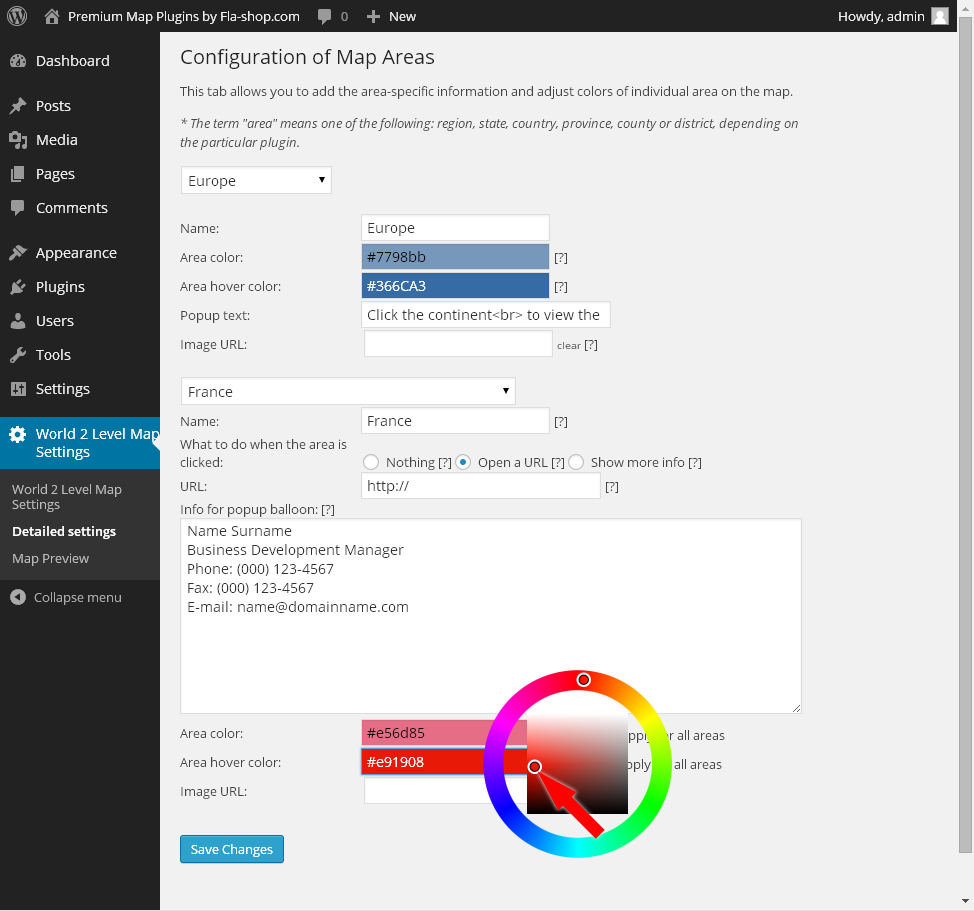
Detailed Settings
In this menu you can customize all necessary area-specific information for each level on the map.
Note: The term "area" means one of the following: continent, country, state, province, county or district, depending on the particular plugin.
To customize the map follow these steps:
- First of all select main area in drop-down list. You will see the customization menu in which you can set all necessary parameters for this level of detail:
- Area name.
- Area color/hover color.
- Popup text.
- Image URL (for popup text block).
- In the appeared drop-down list select the necessary sub region (second-level area) and customize the necessary settings:
- Area name.
- Action when the area is clicked.
- Area color/hover color.
- Text for the popup window.
- URL of the image which will be displayed in the popup.
- After completing the customization of all necessary areas don't forget to click the "Save changes" button at the bottom of the screen.
Note: "Show more info" option leads you to fully-functional WYSIWYG editor with the ability to add media files. This information block will be shown near the map (on the top, left, right side or on the bottom).
Note: You have two ways to change the color:
- Enter the color hex code manually in the corresponding field.
- Click in the field with color hex code, drag the circles with your mouse pointer in the circle field to customize the color palette.
Click at the central square field to choose the color. Drag the pointer to change the color if necessary. After all, left click somewhere outside to set up the color.
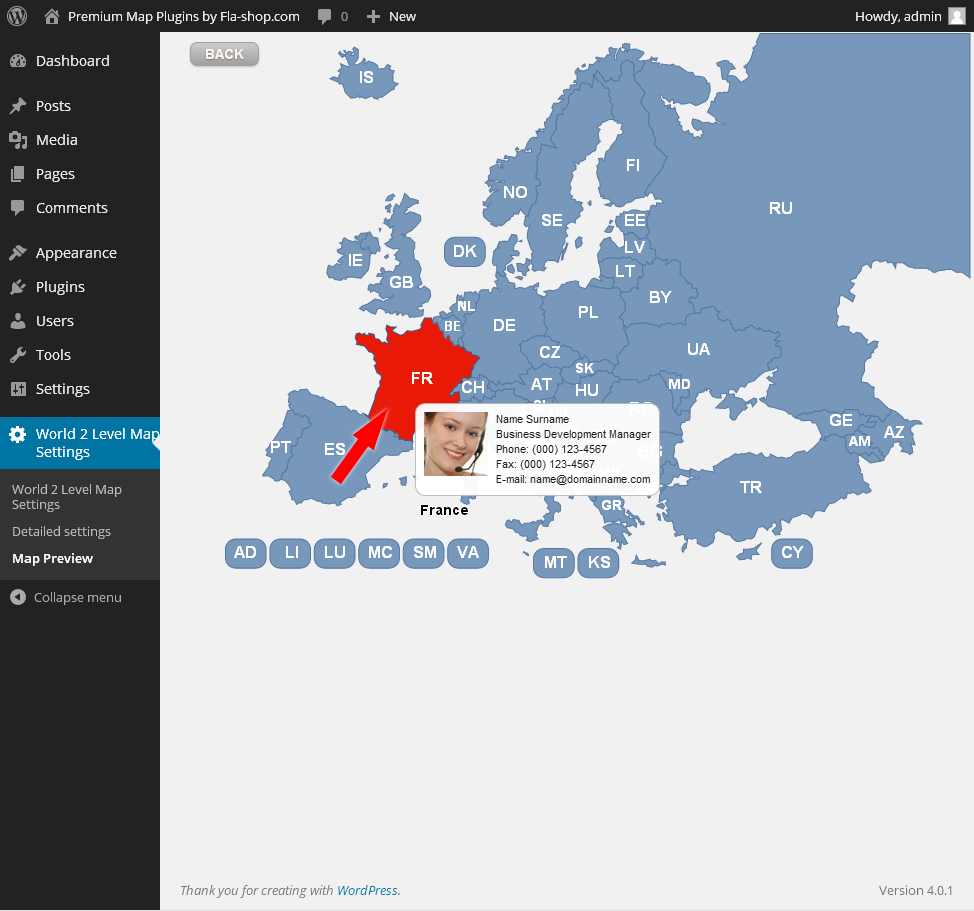
Map Preview
This menu allows you to preview the results of customization at each level without the need to embed the map into the blog post.
For additional information about the WordPress Locator Map plugin see our "FAQ".
How to embed the map into WordPress
After the customization is finished you need to embed your interactive map into WordPress post or page. You can do it only with a special shortcode. To find the shortcode follow these steps:
- Left click on the "Plugins" menu in the left side of the screen.
- Look for your active plugins list in the right side of the screen and find your interactive map plugin.
- Find the shortcode name and copy/paste it into the WordPress page or post.